COMPOSITION / FRAMING
GUIDELINES FOR YOUR SHOOT
The way you deliberately frame a shot can make a huge difference in the look of a scene. Before hitting the record button, ask yourself these questions:
Fill the frame with your subject.
This is a good rule of thumb for most shots. There is only so much space within the two-dimensional rectangle that is your canvas. Don’t waste any of that real estate! For example: Which of these two images is more attention-grabbing?

Headroom:
When filming people, give them enough room to breathe, but not too much.

Too much headroom:
Look at all that wasted space at the top of the frame. You could fly a jumbo jet over his head!

Good headroom:
Much better! By tilting the camera down, we got rid of all that extra space at the top, but there’s still enough room for the talent to move around without worrying about “smacking his head” on the top of the frame.
Nose Room:
You typically want to leave more space in front of the subject than behind them. This allows the viewer to see what the subject is seeing.

Bad nose room:
What is Dave doing? Nobody knows! And who cares about the filing cabinet behind him? It’s not part of the action, but it’s taking up a third of the frame.

High angle:
With such a high angle, our subject appears unimportant.

Low angle:
Now our subject is a menacing giant! Usually, you’ll want to align the camera at or slightly below the level of your subject’s eyes.
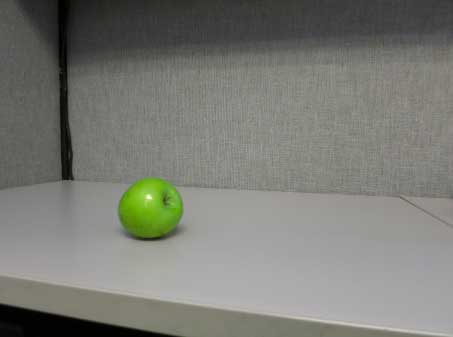
Depth:
Video is a two-dimensional medium that tries to trick the viewer into believing that they’re actually looking at a three-dimensional image. The best way to achieve this effect is to include several objects in your shot that are at different distances from the camera.

The image is not terrible, but there is little depth to it. Everything is basically on the same plane. Let’s see what happens when we add an element to the foreground.

Not only does this picnic table fill up all that empty green space in the foreground, but it provides a point of reference that lets you judge the depth of the whole scene. All the layers in this image give the feeling that you could walk right into the frame.
SIDE NOTE:
While this is a usable shot, the horizon is not exactly horizontal. Always make sure your tripod is level.

Rule of Thirds:
The Rule of Thirds is not set in stone, but it’s a good starting point for learning composition.

Let’s analyze this shot.

If we divide the frame into horizontal and vertical thirds, we can understand why this composition works.

Notice how our subject, the golfer, lines up with the left vertical line, his head (the most important part) is right at the intersection of two of the lines, and the horizon more or less matches up with the top horizontal line.
This type of composition is aesthetically pleasing to the human eye. Try lining up the dominant lines in your scene with these lines, and position the main subject at one of the intersections. Everything doesn’t have to line up perfectly, and don’t worry about following this rule 100% of the time, but it’s a good starting point when composing a shot.